How to Convert IPYNB to HTML in Google Colab
Try our Free IPYNB to HTML Converter
If you want to know how to convert IPYNB to HTML in Google Colab, you can do it directly inside Colab without installing anything locally. Follow these steps!
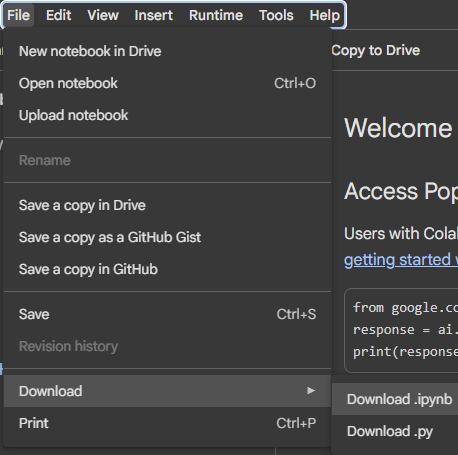
Step 1 – Download your .ipynb file
In Google Colab, go to File → Download → Download .ipynb to save your notebook to your computer.
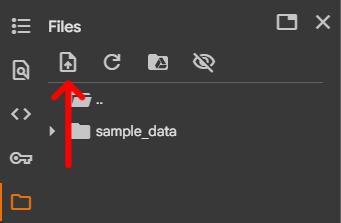
Step 2 – Re-upload your file
Click on the Files on the far left in Colab. Then
choose Upload to session storage and select the
.ipynb file you just downloaded.
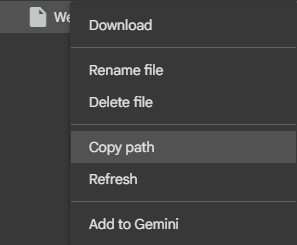
Step 3 – Get your file path
Once uploaded, locate your notebook file in the file list. If it
doesn’t show up immediately, click the
Refresh button. Copy the full path of your file (e.g.
/content/mynotebook.ipynb).
Step 4 – Convert using %%shell and nbconvert
%%shell
jupyter nbconvert --to html /PATH/TO/YOUR/NOTEBOOKFILE.ipynb

/PATH/TO/YOUR/NOTEBOOKFILE.ipynb with the path
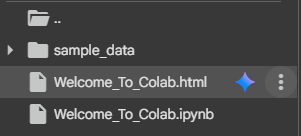
you copied earlier. This will generate an HTML file of your notebook,
which you can then download from the Colab file browser.
Alternative – How to Convert IPYNB to HTML in Jupyter Notebook
The fastest way to convert an IPYNB file to HTML without using an online tool is to export it directly inside Jupyter or JupyterLab. If you are wondering how to convert IPYNB to HTML in Jupyter Notebook, here is the step-by-step process:
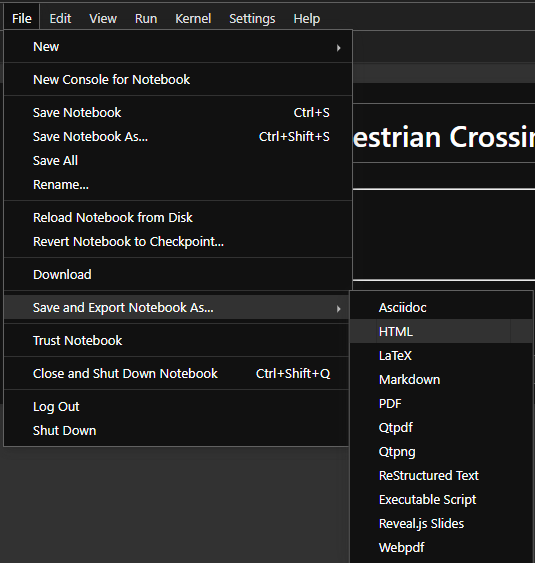
- Open your
.ipynbfile in Jupyter or JupyterLab and make sure it is saved. - Go to File → Save and Export Notebook As… → HTML.
- Choose a location – Jupyter instantly creates a standalone HTML file of your notebook.
Alternative – How to Export IPYNB to HTML in VSCode
With the Jupyter extension in Visual Studio Code you can export notebooks directly. This is useful if you want to convert IPYNB to HTML without switching to the terminal.
- Make sure Python and the Jupyter extension are installed in VSCode.
- Open your
.ipynbfile in VSCode – the notebook editor view loads automatically. - Click on Export in the toolbar and select HTML.
- Save the file – VSCode will generate a standalone HTML document that you can open or share.


jupyter nbconvert --to html --embed-images --embed-resources notebook.ipynb
in the terminal. This creates a single file that can be published, shared, or opened with an IPYNB viewer online.
Or skip the export steps and directly upload your notebook to our IPYNB to HTML Converter tool .